
Early April: Heating, Lighting, and Arithmetic
In times of uncertainty in our human world, nature can be quite a comfort. Though society is in flux, nature persists. The daffodils and forsythia burst forth in yellow splendor, right on time, and the male goldfinch sheds his brown winter plumage to join them.
At our house, we took this cue to start outdoor preparations for our veggie garden in earnest this week, applying compost to the soil and setting up irrigation lines and fencing. The work brought relief, exercise, and fresh air, and dreams of home-grown dinners to come. We hope you're finding similar joy in the process of working with nature to grow your own food.
Last week we talked about timing when we start seeds indoors. For outdoor tasks, we touched on the handful of plants ready for direct planting. In the next few weeks, this list will expand dramatically!
This week, on the indoor front we'll cover simple strategies for keeping your newly germinated seedlings happy with proper heating and lighting, as well as what to do if your seeds don’t germinate as they’re supposed to. Out in the yard, we’ll discuss locating your veggie garden beds or containers and how to prepare them for planting and transplanting this week and beyond. We’ll also take a closer look at tips for planting this week’s featured veggie: peas!
Don’t forget to check out the Deep Dive resources included at the end.
So as we wait for New England weather to pick a season, let’s look at what we can do indoors.
Indoors
First, always read and follow the directions on the seed package! Some have specific requirements, like soaking seeds before planting (peas) or leaving the seed on top of the soil exposed to the light to stimulate germination. Nature works in mysterious ways...all we can do is try to learn and play by her rules.
Heating for Better Germination Rates
Most seeds like soil that’s about 65-70 degrees in order to germinate. Some want warmer soil—like tomatoes, which prefer 70- 85 degrees; okra, 85-95 degrees; and peppers, 70-75 degrees. Some people have places in their houses that are warm. If you have a refrigerator that isn’t super efficient, it’s usually pretty warm on the top. Or you can use an incandescent light in a dome and clamp it under your seed table to give you an extra 5-10 degrees.
Alternatively, you can purchase a heat mat on which to place your trays, and it will increase your temp by about 15 degrees. You can fit 200-300 seedlings (if you use the seed-blocking method and use the small block) on a small heating mat that costs about $20-25.

Lighting
LED lights have gotten fairly inexpensive and will save you on electricity. Use an LED that has a rating of 5000-7000K (Kelvin) to give you the end of the light spectrum that plants can use.
One of the most common mistakes people make is not keeping the light fixtures close enough to the plants. The bulb should just be an inch or two from the tops of your plants. Try grouping plants of the same height together to make this possible.

Photo credit: Floret
You should have your lights on for 16 hours a day. Be sure to have a timer set up because plants need a nighttime break for proper growth. Don’t keep the lights on them all the time!
But wait, what if my seeds didn't come up? Sometimes the seeds weren’t viable; other times we mismanaged their care. If any of your seeds’ germination dates have come and gone with nothing to show, start by taking a look at your labels.
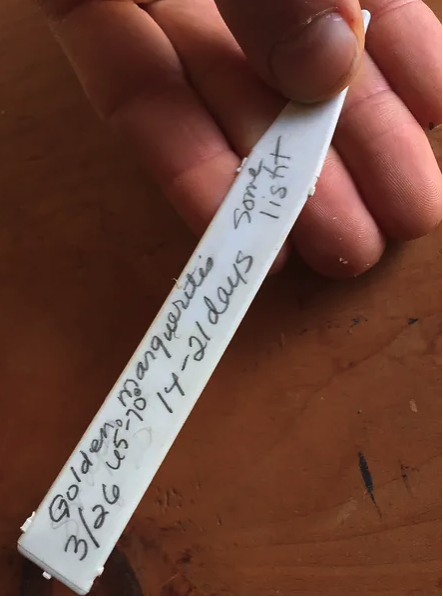
Labeling your seed trays at the start is so important! Here is the information you should include on your label to be able to track progress and determine if there is a problem:
The name of the variety.
The date you planted the seeds.
The temperature for optimum germination. (This helps you know whether the plants need to be on the heating mat.)
How many days it typically takes for germination of that variety (usually found on the seed packet).
Whether the seeds need light to germinate. Some varieties need light, which means they don’t want a covering of soil. This is nice to know while you’re seeding, and good info to have on the tag.
Knowing this information means that after the germination days have passed, you can assess whether the seeds were, in fact, viable and hopefully have enough time to get new seeds and have another try.
Outdoors
Location, Location, Location.
Where you plant your veggie garden can make or break overall production. Here are some things to consider:
You will need 8 hours of full sun for the entire growing season. At this point (mid-April), we are just over two months from the sun being its highest in the sky. In October, when you want those tomatoes to finish ripening, we will be four months from the sun being its highest, so keep this in mind when looking at garden location. Those trees can have a big impact on the sunlight making it to your garden, especially in fall. And for plants you want to harvest fruit from, you need full sun!
But never fear! For those corners in the garden that are a bit shadier, try planting your leafy greens. They like a bit of shade, but still about 4 hours of full sun.
Once you've sited your veggie garden, the next step is preparing it for receiving seed and seedlings. This starts with soil preparation. Here are the basic steps for prepping your garden beds before you direct seed or transplant:
Weed out as much as you can.
If you are going to till, now is the time, as long as the soil isn’t too wet. (We don’t till anymore, preferring to sheet mulch in the fall. That’s for another post.)
Add at least a ½ inch of compost to the top of the soil and gently rake it in. The worms etc. will work it through the soil profile, and nutrients will seep downward, so you can leave the compost mixed into upper soil.
We would advocate for an organic granular fertilizer to be added with the compost, as well as some lime. You should have your soil tested first but if you can’t this spring, late fall is a perfect time. Here is a link for getting your soil tested through the University of Massachusetts Center for Agriculture, Food, and the Environment. You send the soil sample via the mail, and UMass ““will email you the results.
Once your seeds have sprouted or you have transplanted your plants outside, you can mulch, but not yet!
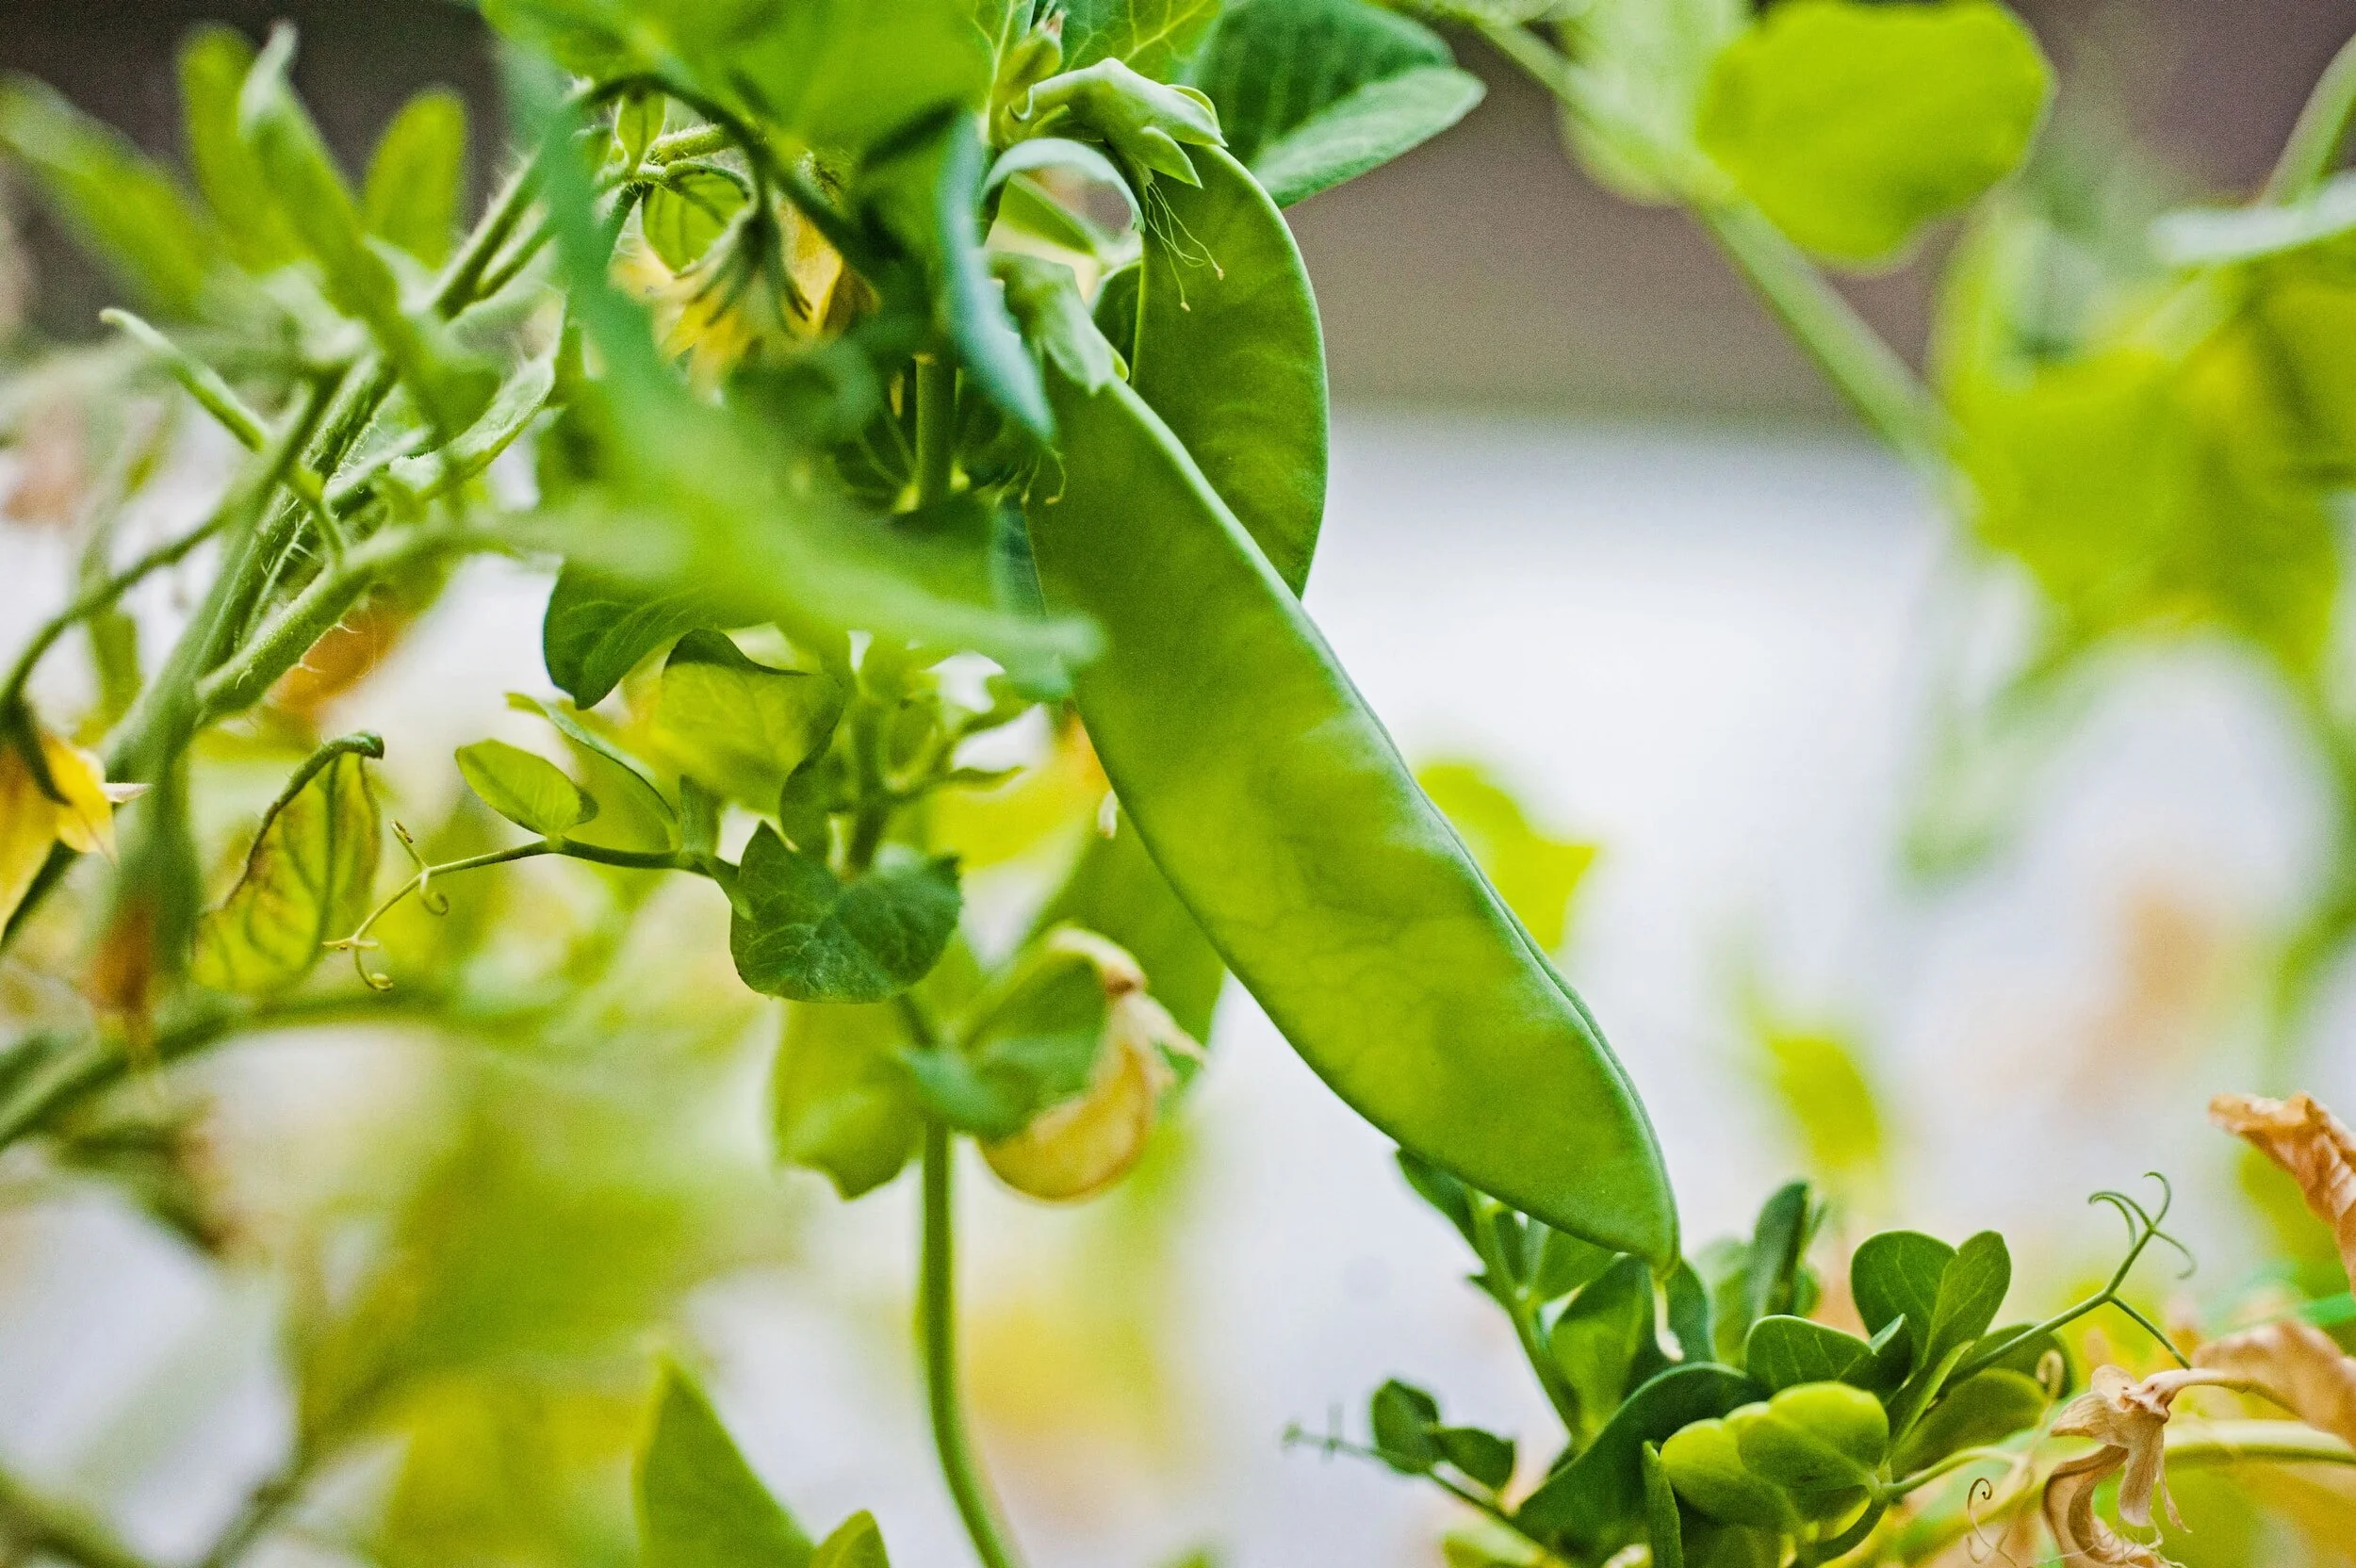
Veggie Spotlight: Peas
There is still time to plant your peas for the next week or so. Don’t forget to soak pea seeds in water overnight. We find it really speeds germination. Peas are a cold-weather crop, so by July you will be pulling them out of the garden and you can plant another short-duration crop in that space. Did you know that there are four types of peas you can grow?
Here are some links for planting peas:
“How to Plant and Grow Peas” by Burpee Gardening
“How to Plant Peas at Home” by P. Allen Smith
Plenty of veggies can be planted directly into the ground or a container now (or transplanted if you already started them indoors) :
Peas
Kale
Chard
Lettuce
Carrots
Beets
Radishes
Potatoes

To Recap Today’s Essential Concepts:
Using heat under your seed trays can increase your germination.
Shop lights should be placed very close to your seedlings to give you strong, healthy plants.
Include a lot of information on your labels to guide you through the germination/seedling process.
Coming Up Next Week:
Next week, we talk about how to fertilize seedlings properly and avoid common diseases they can face while still indoors (like damping off). We’ll also cover the pros and cons of pelleted and non-pelleted seeds, and discuss an important gardening concept: planting density (i.e., how much should you plant, and how close together?).
And have you ever wanted to grow potatoes but weren’t sure where to start? We’ll show you how. They’re relatively low maintenance, store great, and oh so fun to harvest. The perfect plant for food security and fun family activities!

Deeper Dive Resources
“Seed Starting 101” by Growing a Greener World touches on many of the seed-starting ideas we have covered and introduces you to a few new ones too, like soil blocking.
Check out a different way to start seeds, by Kevin Lee Jacobs.
This video by Suburban Homestead shows a new way to sow carrots. The first half is about a new sowing process, and the second half is a cooking demo.